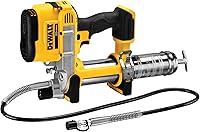
How to Load a Milwaukee Grease Gun
To load a Milwaukee grease gun, remove the battery, secure the plunger, insert a compatible cartridge, and prime the pump. Use your model's instructions for cartridge direction, barrel assembly, and air bleeding.
On this page (9 sections)
- What should you check before loading a Milwaukee grease gun?
- How do you load a Milwaukee grease gun with a cartridge?
- How do you prime the gun after loading?
- Which Milwaukee grease gun suits your maintenance work?
- Should you use cartridges or bulk grease?
- What grease should you buy for a Milwaukee grease gun?
- What mistakes stop a loaded grease gun from pumping?
- How should you care for the gun between refills?
- How to load a Milwaukee grease gun and choose the right setup
To load a Milwaukee grease gun, remove the battery, secure the plunger, insert a compatible cartridge, and prime the pump. Your model's manual sets the exact cartridge direction, plunger position, and air-bleeding procedure.
Loading fills the barrel; priming moves grease through the pump and hose. Complete both before connecting to equipment, or trapped air can leave the motor running without delivering grease.
For a broader explanation of cartridge and bulk methods, see how to load a cordless grease gun.
What should you check before loading a Milwaukee grease gun?
Start with the model number, correct grease, and approved loading method. The Milwaukee 2446-20 M12 and 2646-20 M18 both have air bleeder valves, but you shouldn't assume their barrel and plunger procedures are identical.
Read the equipment's lubrication instructions before choosing grease. Match its required grade and performance specification, then confirm the cartridge fits your gun.
Set out a clean rag, a container for priming waste, and the replacement cartridge. Wipe dirt from the barrel joint before opening it so grit doesn't fall into the grease.
Remove the battery and follow the manual's pressure-release procedure. A stopped motor doesn't mean pressure has left the hose, so don't loosen connections just because you've released the trigger.
How do you load a Milwaukee grease gun with a cartridge?
Secure the follower, replace the cartridge, and reassemble the barrel before priming. Work with the battery removed, and follow your manual wherever its steps differ from this general sequence.
How to load a Milwaukee grease gun cartridge correctly
- Release pressure as directed. Clean the outside of the barrel and head before opening the gun.
- Pull back and secure the plunger rod. Engage the retaining mechanism specified for your model so the spring-loaded follower stays back.
- Unscrew the barrel from the head. Keep both mating surfaces clean and remove the empty cartridge.
- Prepare the new cartridge. With a typical standard cartridge, remove the plastic cap and slide that open end into the barrel first.
- Remove the pull-tab seal. The pull-tab end normally faces the pump head; remove the entire seal and check for loose pieces.
- Reconnect the barrel by hand. Start the threads squarely and follow the manual's tightening and venting sequence.
- Release and position the follower as directed. Some rod arrangements require an additional disengagement step, so don't assume pushing the rod inward completes the job.
- Reinstall the battery for priming. Keep the coupler disconnected from equipment until you have steady grease flow.
The cartridge should slide into place without being crushed or forced. If it catches, check its size, the empty sleeve, and the follower position before applying more pressure.
If the barrel binds as you screw it onto the head, back it off and start again. Forcing misaligned threads can damage the joint and leave a poor seal.
How do you prime the gun after loading?
Use the air bleeder and your model's priming procedure until grease flows steadily from the coupler. A full cartridge can still leave an air pocket between the grease and pump inlet.
Point the coupler into a suitable container, away from people. Keep your fingers clear of the outlet and never feel along a pressurized hose to find a leak.
Operate the bleeder only as instructed, then run the gun using the recommended priming sequence. Sputtering or interrupted discharge means you need to finish clearing the air before servicing a fitting.
Don't keep holding the trigger if nothing comes out. Remove the battery, release pressure as directed, and check the cartridge openings and follower position before trying again.
Once flow is steady, wipe the coupler clean. Follow our guide to using a grease gun on a Zerk fitting for attachment and controlled application.
Which Milwaukee grease gun suits your maintenance work?
Choose the M18 for reach and dispensing controls, or the M12 for a lighter tool and simpler routine service. Both options here are bare tools, so account for a compatible battery and charger before buying.
For a wider look at battery platforms, workload, and hose access, read how to choose a cordless grease gun.
Milwaukee M18: for frequent service and awkward fittings
The Milwaukee 2646-20 has a 48 in flexible hose, two speeds, and a pre-set grease counter dial. Its maximum operating pressure is 10,000 PSI, and it weighs 9 lb.
Those features suit maintenance routes with many fittings, especially where you need to set the tool down and reach around equipment. The speed choice lets you select maximum pressure or maximum flow, while the counter helps control dispensing.
Skip it if carrying less weight matters more than hose reach and dispensing controls. Its pressure ceiling isn't a reason to force grease into a blocked fitting or exceed an equipment maker's lubrication instructions.
Treat the counter as a dispensing aid, not a substitute for the machine's service schedule. Our Milwaukee 2646-20 M18 grease gun review covers the tool in more detail.
Milwaukee M12: for lighter carrying and routine refills
The Milwaukee 2446-20 weighs 7.2 lb and includes a 36 in flex hose with spring guard. It develops over 8,000 PSI and accepts a 14 oz cartridge or 16 oz of bulk grease.
Choose it if you want less weight to carry between service points or already use compatible M12 batteries. Its integrated hose storage also gives the hose a place to sit between jobs.
Skip it if your main needs are the M18's longer hose, two-speed choice, or pre-set counter. Buy around the fittings you need to reach and the controls you'll use, rather than pressure alone.
Should you use cartridges or bulk grease?
Cartridges suit occasional refills; bulk filling suits an established supply of the correct grease. The M12 supports bulk filling through a filler valve, but confirm support and the exact method for any other model.
A cartridge keeps handling contained and makes it easier to keep different greases separate. It's the practical starting point if you service only a few machines or don't already have bulk-filling equipment.
Bulk filling makes sense when you regularly use one compatible grease and have the approved filling setup. Keep the source container and filler connection clean, and follow the tool's capacity limit.
Don't improvise an adapter or pack grease around an installed cartridge. Use the approved method from start to finish, including any follower adjustment required when changing loading methods.
What grease should you buy for a Milwaukee grease gun?
Buy grease for the equipment's requirements, then match its packaging to the gun. A cartridge fitting inside the barrel doesn't make its contents right for every bearing or joint.
AtomLube Ultra Heavy Duty Red Grease comes as 2 tubes of 14 oz grease. AtomLube identifies it as NLGI #2 lithium grease meeting the GC-LB classification for automotive wheel bearing and chassis applications.
It suits buyers whose equipment calls for those specifications and whose gun accepts that cartridge size. Skip it when a machine requires a different grade, chemistry, or approval.
Don't choose by red color alone, since color doesn't guarantee compatibility. If you're changing grease types, get compatibility guidance before mixing them and follow the equipment maker's changeover procedure.
What mistakes stop a loaded grease gun from pumping?
Check for trapped air, an unopened cartridge end, or a follower that hasn't been released. These loading problems need inspection, not a longer pull of the trigger.
If the coupler has no flow while disconnected from equipment, revisit priming first. Remove the battery and release pressure as directed before checking the barrel assembly.
If grease flows freely into a container but stops at one fitting, inspect that fitting and the coupler connection. Don't assume the cartridge is empty or use maximum pressure to force a blockage.
An empty barrel, a stuck follower, or a leak can also interrupt delivery. Stop using a damaged hose, and never loosen a connection while it's pressurized.
For a fuller fault-checking sequence, see why a cordless grease gun isn't pumping.
How should you care for the gun between refills?
Keep dirt out of the grease path and protect the hose from damage. Wipe the coupler before attaching it, and clean the barrel rim whenever you replace a cartridge.
Store spare tubes closed and away from dirt. Label tools used with different greases so you don't accidentally carry an incompatible lubricant to the next machine.
Inspect the hose for cuts, kinks, and damaged connections before use. Store it in its holder where available, without sharp bends or tension on the coupler.
How to load a Milwaukee grease gun and choose the right setup
Choose the M18 for reach and dispensing control, or the M12 when lower carrying weight matters more. Keep your current gun if it already meets your needs and only needs a clean refill and proper priming.
Learning how to load a Milwaukee grease gun starts with the right grease and ends with steady flow before attachment. Use cartridges for straightforward refills, and choose bulk filling when your tool and maintenance setup support it.
Keep the general grease gun loading guide handy for the next refill. If you also service a DeWalt tool, use the separate guide to priming a DeWalt grease gun for that model's process.
Frequently asked questions
How do you load a Milwaukee grease gun?
Remove the battery, release pressure as directed, secure the plunger, and remove the barrel. Insert a compatible cartridge, remove its closures in the correct order, and reassemble the gun; follow your model's plunger-release and air-bleeding steps, then check grease flow into a container before connecting to a fitting.
Which end of a grease cartridge goes in first?
For a typical standard cartridge, the plastic-cap end goes into the barrel first after you remove that cap; the pull-tab end stays near the pump head until you remove its seal. Confirm this arrangement in your Milwaukee manual, since the cartridge and barrel must match the tool's loading instructions.
How do you prime a Milwaukee grease gun after loading?
Use your model's air bleeder and priming procedure to remove trapped air until grease flows steadily from the coupler; point the outlet into a container and keep your hands clear. If flow doesn't start, remove the battery and release pressure as directed before checking the cartridge, follower, and barrel assembly.
Can you load a Milwaukee grease gun with bulk grease?
The Milwaukee 2446-20 M12 Grease Gun supports bulk filling and holds 16 oz of bulk grease; use its approved filling procedure and keep the filler connection clean. For another model, confirm bulk-fill support in its manual before buying filling equipment or attempting to load grease without a cartridge.